Reaching the Alien Ruins in Subnautica 2 marks a massive shift in gameplay, transitioning you from the initial tutorial phase into the true survival experience. This journey takes you deep into uncharted waters where the stakes are higher and the predators are far more aggressive.
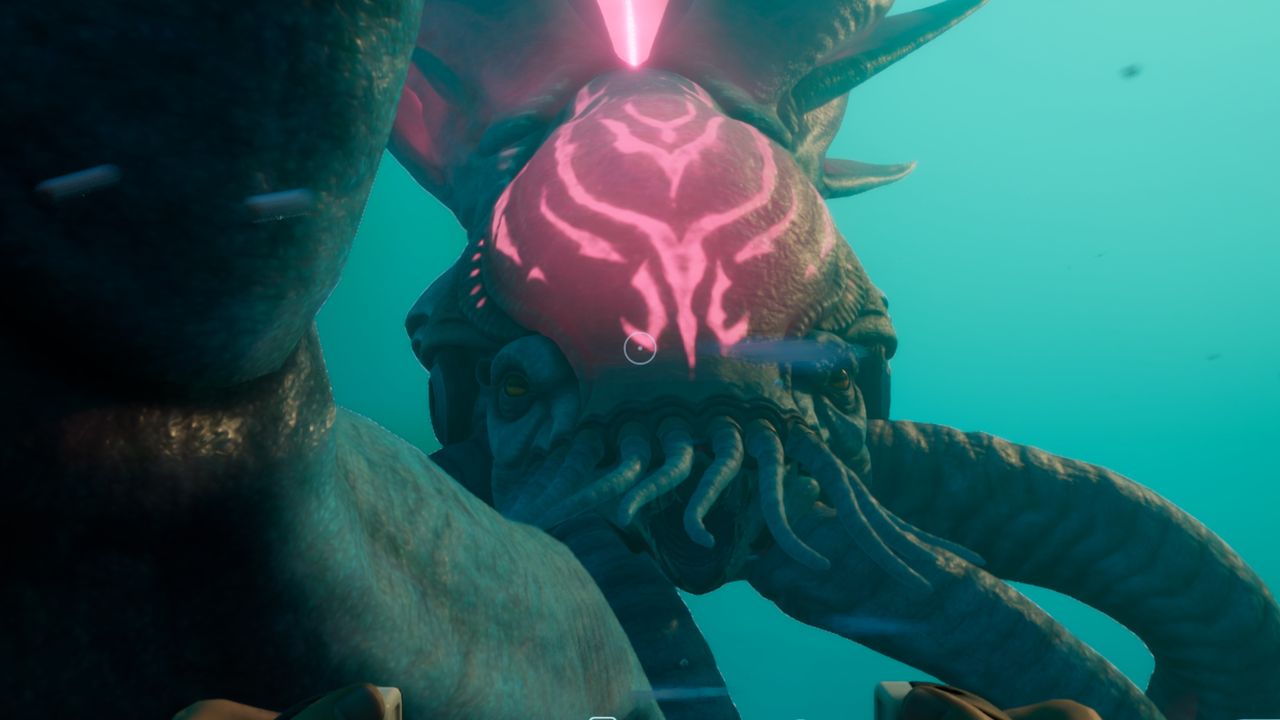
To get there, you must traverse an open expanse patrolled by the Collector Leviathan—the largest and most dangerous predator encountered in the game so far. Once you arrive, your objectives will shift rapidly, requiring new tools and a completely different approach to resource management.
How to reach the Alien Ruins in Subnautica 2
The journey begins immediately after you investigate the Tadpole Pens. You will receive a mission objective to cross the gorge and head toward the ruins, which are located over 600 meters to the east. While you can technically return to your starting point at any time, the trek is incredibly dangerous and resource-intensive.
Before making the trip to the Alien Ruins in Subnautica 2, ensure you have completed these essential preparations:
- Upgrade your Tadpole: Visit a Vehicle Bay terminal to build the Scout Ray Chassis Tadpole upgrade. This increases speed and handling; if you missed the blueprint, it is located inside the Tadpole Pens.
- Expand storage: Use Biobeds to increase your inventory size.
- Stock up on supplies: Pack extra batteries, a spare power cell, food, water, and medical supplies.
- Gather building materials: Bring plenty of quartz, titanium, copper, and silver to sustain your new operations.
To successfully navigate the gorge, stay as low to the seabed as possible in your Tadpole or hug the ocean surface. The Collector Leviathan will likely attempt to chase and strike you, but the best strategy is to maintain forward momentum until you reach the cliffs on the other side, where you can hide and repair your vehicle.
Essential objectives after reaching the Alien Ruins
Once you arrive at the ruins, your first priority is the Research Station. Enter the station and head to the bedroom to insert a battery into the socket; this restores power. Next, interact with the NOA in the command room. This will provide a list of locations required to progress the story, which you can later turn into active quest markers through NOA.
To thrive in this new environment, focus on these immediate tasks:
Establish a local base
Use your carried resources and materials found near the Research Station to build a permanent home. Because returning to the starting Lifepod is a massive undertaking, it is highly recommended to build close to the ruins. You can utilize natural currents to place a Hydroelectric Turbine for consistent power.
Upgrade your technology
The new area introduces critical tools that change how you interact with the world:
- Modification Station: Scan the one located near the Research Station entrance and build it in your base to access advanced tool and vehicle upgrades.
- Tadpole Depth Module: Located near Ruby's second blackbox in the cave beneath the Needler nest (270 meters southeast of the ruins), this is vital for deep-sea exploration.
- Bioscanner: Found in the Cicada wreckage 500 meters southeast of the Research Station, this allows you to unlock new Biomods by scanning local fauna.
Gather new materials
The area surrounding the ruins contains several exclusive resources necessary for high-tier crafting:
- Creature Enamel
- Celestine
- Conduit Crystal
- Atacamite
- Troilite
- Axum Bacterial Culture