Locating All Colonist Bunkers in Subnautica 2
For players diving into the depths of Proteus, finding every Colonist Bunker is essential for maximizing your character's potential. These hidden structures were once the homes of colonists attempting to survive on the ocean planet, and while their inhabitants are long gone, the facilities remain intact.
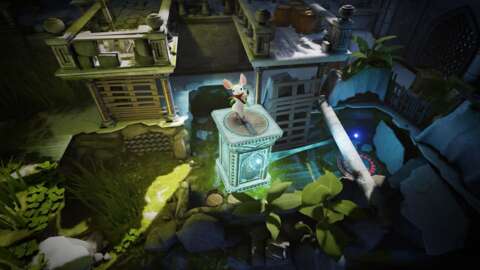
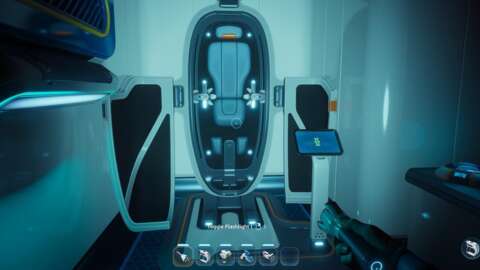
The primary draw for exploring these locations is the biobed found inside each one. Activating a biobed grants a permanent upgrade that is crucial for early-game progression. Currently, four distinct Colonist Bunkers have been identified across the seabed. While these locations are optional, securing these upgrades will significantly improve your inventory management and tool efficiency.
Here is a detailed breakdown of where to find each bunker and the specific rewards they offer.
Bunker 1: Anita’s Garden
This bunker is located relatively close to your starting point, making it an early priority for new explorers.
- Location: 100 meters east-southeast of the Lifepod.
- How to Find It: As you approach the area, you will encounter a strong underwater current that pushes you downward. Ride this current into the cavern below. Look for Alterra crates containing a Wakemaker fragment and a recording on the northeast side. From there, locate a tunnel marked by red kelp and enter it to find the bunker.
- Biobed Upgrade: Endurance – Gain +3 inventory slots.
- Other Scannable Objects: None.
Bunker 2: Salvage
The second bunker requires a bit more navigation but is situated near other notable landmarks.
- Location: Roughly 200 meters north-northeast of the Lifepod.
- How to Find It: This site is close to the Angel Comb Adaptation. Look for a cave opening adjacent to a ledge containing Alterra equipment. Swim down to the bottom of this opening and check to your left.
- Biobed Upgrade: Dexterity – Gain +1 tool slot/keybind.
- Other Scannable Objects: Repair Tool and Habitat Builder.
Bunker 3: Quaker’s Meetinghouse
Part of the main narrative objective, this bunker involves navigating through hazardous terrain.
- Location: 250 meters south-southeast of the Lifepod.
- How to Find It: This location is tied to the objective of finding the Chap blackbox recording. It is situated inside a cave guarded by a Coral Crab. A key visual landmark is the set of pillars jutting out from the top of the plateau above the cave entrance.
- Biobed Upgrade: Endurance – Gain +3 inventory slots.
- Other Scannable Objects: Bioreactor.
Bunker 4: Unauthorized NOA Modification
The final known bunker is tucked away near a crash site, requiring careful exploration of the ridge.
- Location: 300 meters south-southwest of the Lifepod.
- How to Find It: Look for a ridge near the seafloor where a hatch is jutting out, located close to a crashed ship.
- Biobed Upgrade: Endurance – Gain +3 inventory slots.
- Other Scannable Objects: Tadpole Fragment.
Maximizing Your Survival
While these four Colonist Bunkers provide the most immediate tangible benefits through inventory and tool slot expansions, they are just one part of your survival toolkit. The upgrades obtained from the biobeds are permanent, meaning you should prioritize visiting them as soon as you are capable.
In addition to securing these bunkers, it is highly recommended to focus on collecting Adaptations. These biological boosts work in tandem with your inventory upgrades to help you handle the increasing dangers of the deep. By combining the utility from the Colonist Bunkers with the passive bonuses from Adaptations, you will be better equipped to handle the sandbox campaign's challenges.
Keep an eye out for any additional bunkers that may be discovered in future updates, as expanding your storage capacity is always a wise investment in the deep sea.