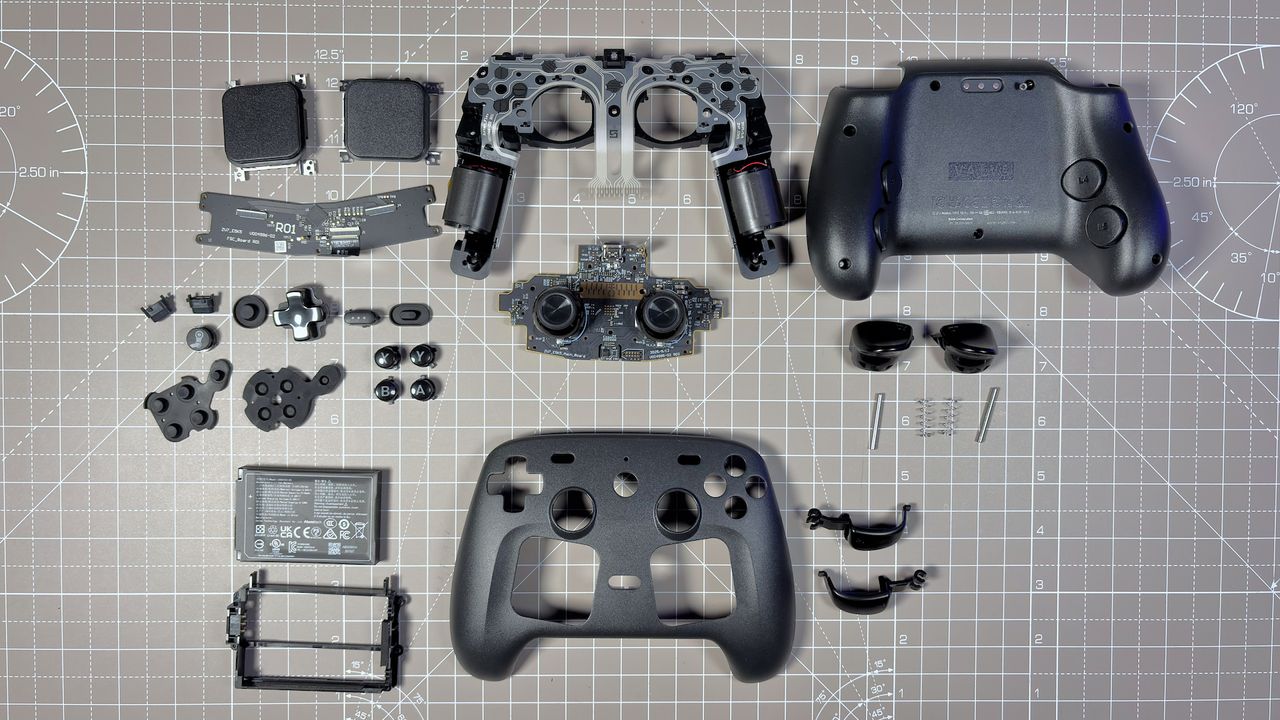
After using the new Steam Controller for several weeks, I have performed a Steam Controller teardown a total of three times. Each time, I stripped the device back to an empty shell. While that might sound like a waste of time, disassembling the unit only takes about 15 minutes once you are familiar with the internals.
Valve has designed the inside of the controller as if it were waiting to be opened. Held together by easily accessible screws, the device contains clearly labeled components that can mostly be repaired or replaced at a home workbench. While certain parts, such as the TMR sticks, may require a soldering iron, Valve has confirmed they intend to make official spare parts available via iFixit in the future, much like they did for the Steam Deck.
Essential tools for a Steam Controller teardown
Before you begin, ensure you have the correct precision drivers to avoid stripping the hardware:
- Torx T6 screwdriver
- Torx T5 screwdriver (specifically for trackpads and the trackpad PCB)
- Tweezers
- Spudger
Addressing the squeaky trigger mechanism
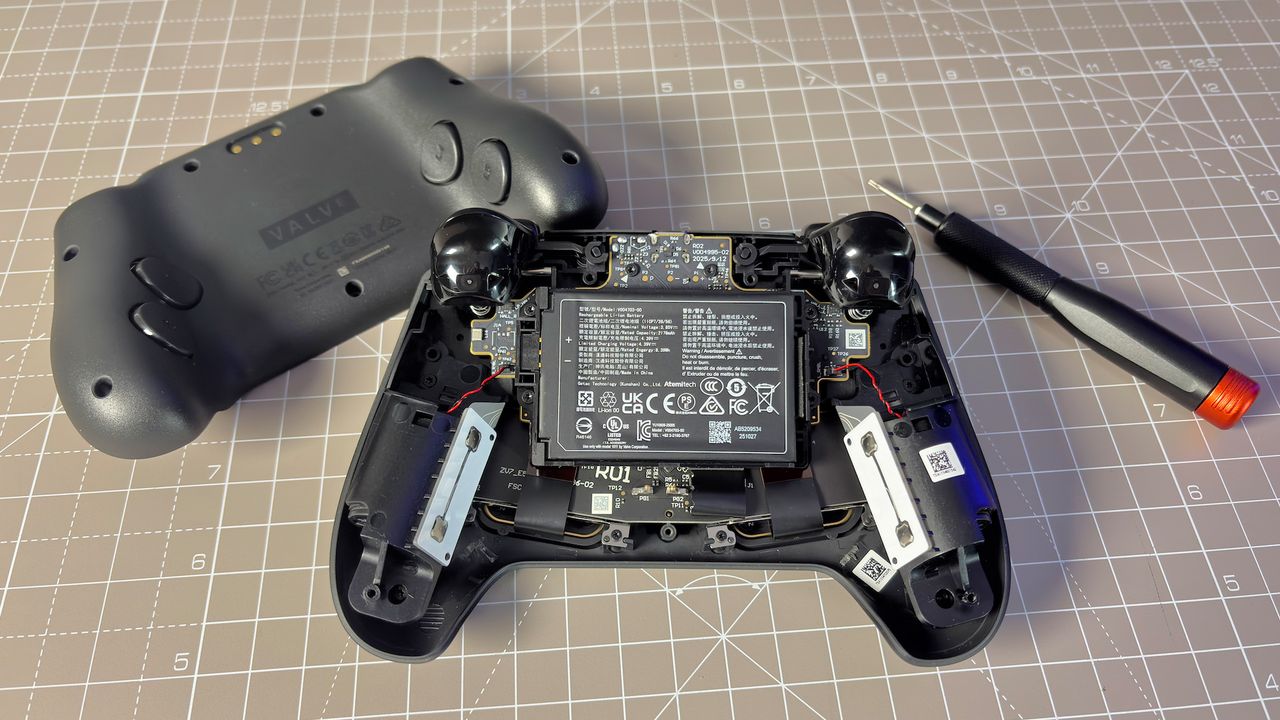
During my initial use, I noticed one of the triggers produced a barely noticeable metallic ping during reset. To investigate, I began the disassembly by removing the seven Torx T6 screws holding the rear shell in place. Once removed, the shell comes away cleanly.
The trigger mechanism is relatively straightforward, featuring a Hall effect design with a simple spring attached beneath the trigger. This sits on a metal bar that runs through plastic struts. In my case, the left trigger spring was slightly angled; after a quick adjustment, the squeak vanished.
Battery replacement and mainboard internals
The internal layout is highly accessible. The battery can be lifted out with just a finger from the right side. Because the contacts are held in place by the housing, replacing the battery requires nothing more than a single screwdriver.
The unit uses a Li-Ion battery manufactured by Getac Technology (Kunshan) Co., Ltd, rated at 2,178 mAh and 8.39 Wh. To access the battery housing, you must remove four shorter Torx T6 screws and disconnect the cables for the haptic motors in the grips.
The mainboard is secured by three additional Torx T6 screws and includes a ribbon cable for the trackpads. At its center sits a Nordic Semiconductor SoC (nRF52833) featuring Bluetooth and 2.4 GHz connectivity. Notably, the TMR thumbsticks are soldered directly to the mainboard. This differs from the Steam Deck, where thumbsticks are on individual PCBs; here, replacing a broken stick would require a soldering iron or a full mainboard replacement.
Deep dive: Trackpads and components
The manufacturing date on the mainboard suggests it was produced in either September or December. If it follows an international format, a September manufacture date implies Valve has been preparing these units for quite some time.
Further disassembly involves removing the haptic motors and the plastic frame. While most screws are accessible, two are hidden behind the triggers. You must also remove a large ribbon cable for the face buttons that is held by small plastic clips. By removing the metal bar attached to the triggers, you can access the struts to apply lubricant or replace buttons and rubber gaskets.
The final stage of the Steam Controller teardown involves the trackpad modules:
- Unhook the ribbon cables from the trackpad PCB.
- Remove four Torx T5 screws (note that these are shorter than the shell screws).
- Identify the Cirque ASIC used for controlling the two modules.
- Remove the four screws on each side to extract the trackpad modules entirely.
Verdict
I am thoroughly impressed with the design. Valve has a proven trackry of prioritizing repairability, and that commitment is clearly evident here. While I initially opened the device to fix a minor squeak, the process revealed a controller built to last.